I’m sure you have seen all the pictures I’ve posted and insta-story videos of G at all the different splash pads this summer. There are tons around us so we’ve been trying to check them all out. We’ve been going to one a week and he just can’t get enough.
We have our little inflatable Target pool that we play in on days we are home, but decided this week that it was time to step up our water game and bring the splash pad here!


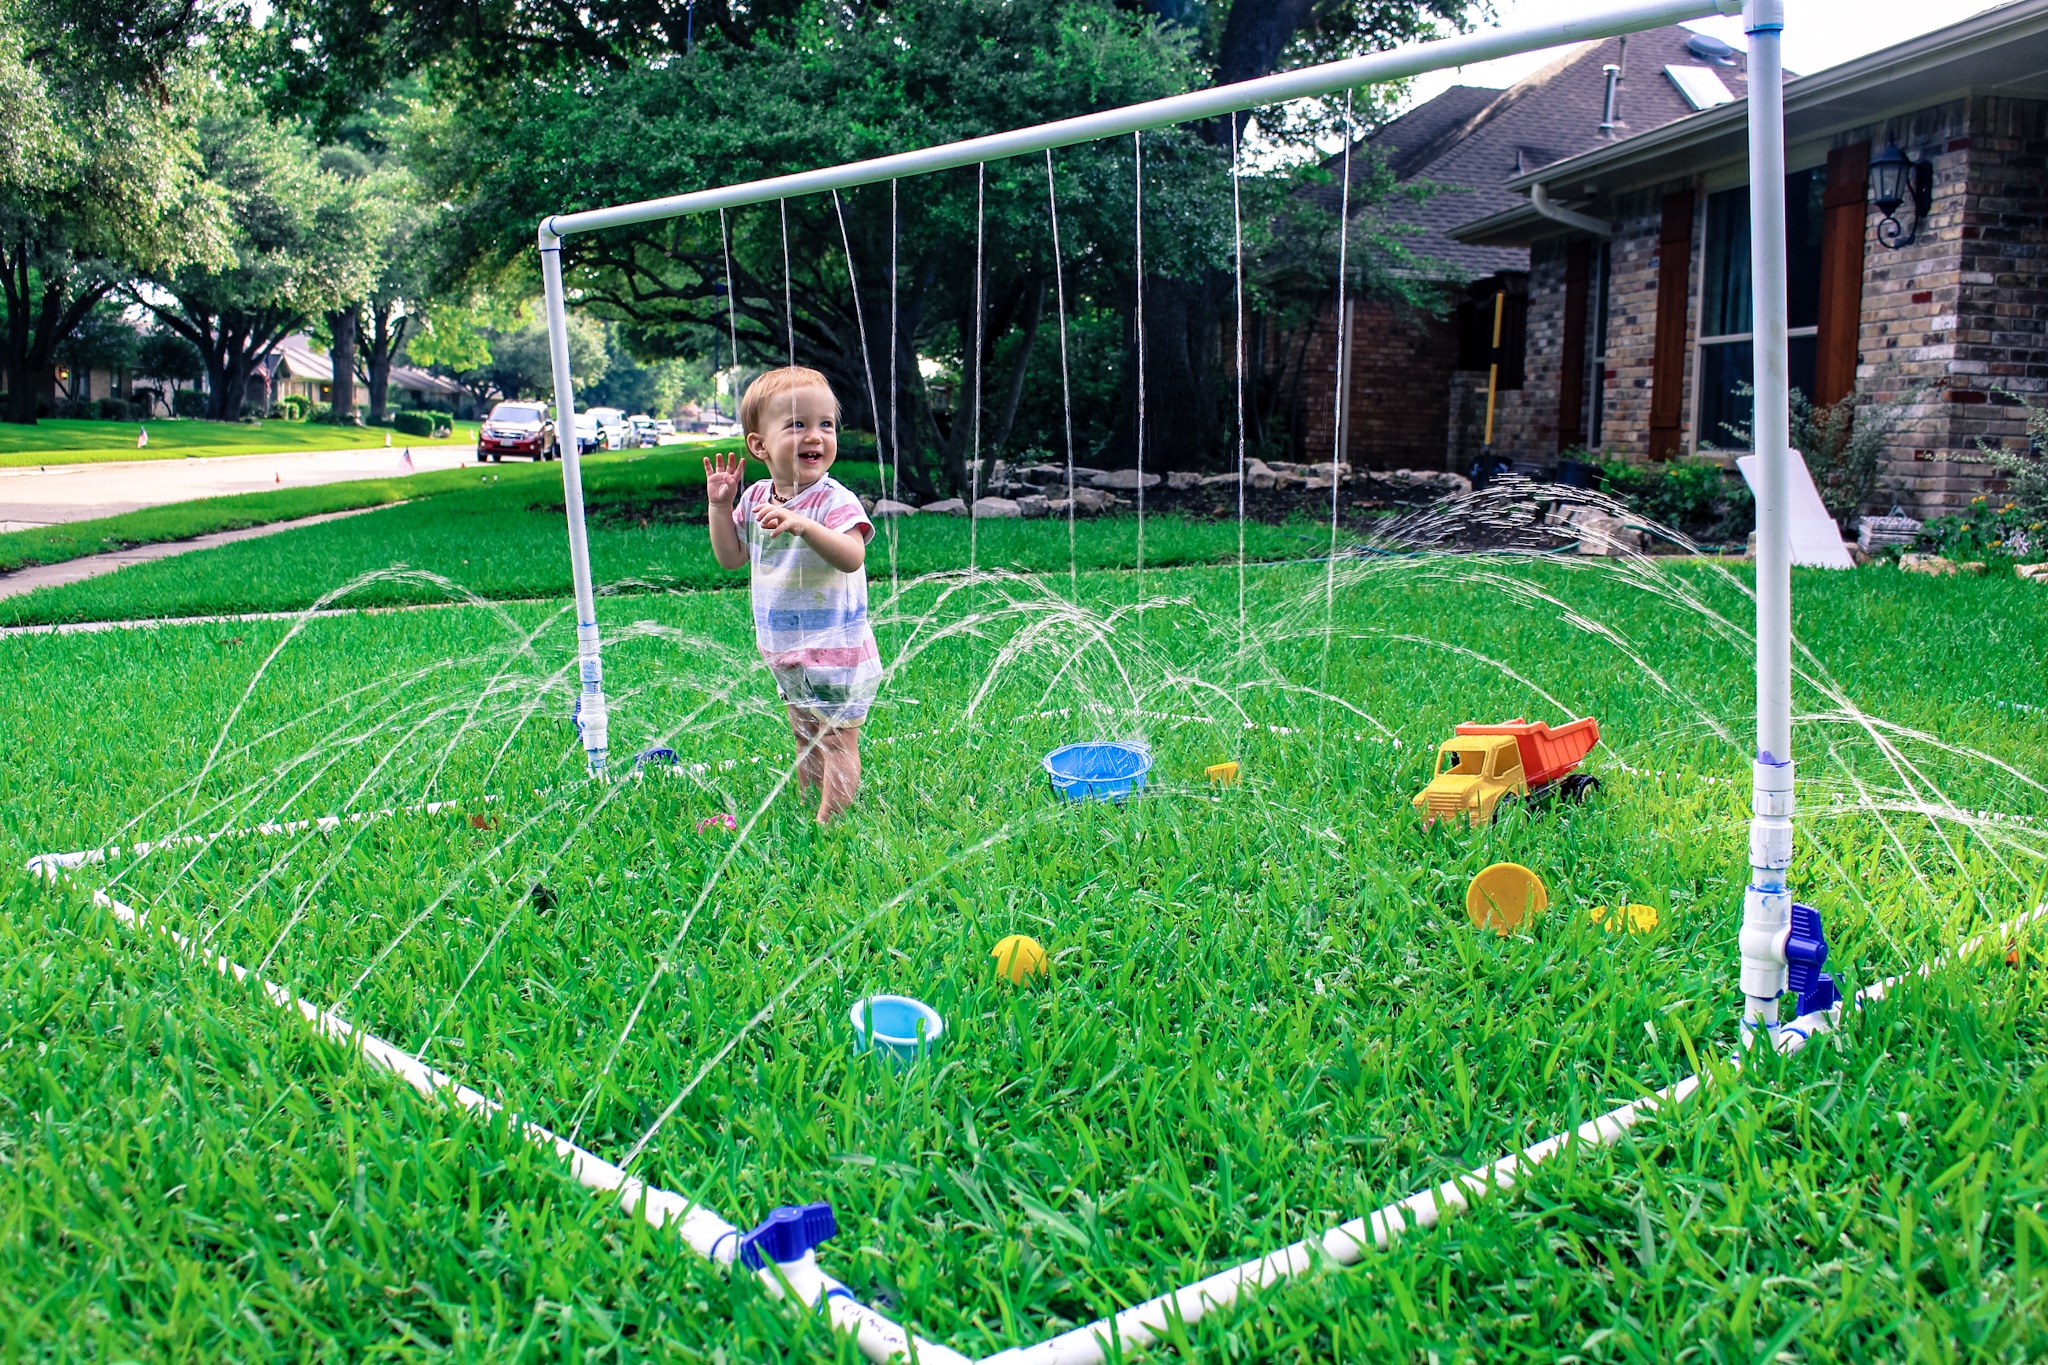
We have used this PVC pipe splash pad every day since we built it and G thinks it is so fun.


*A note on all the valves:
My husband got a little “valve happy” when creating this. When I first saw how many valves he was wanting to add I kept saying “why do you want to do that? Why does it matter? Why can’t we just have one?” But now it totally makes sense.
When we are playing with the splash pad we have control over how much water pressure comes in and where the water goes. We can shut off different parts and have the water spraying on just one side, or just from the top, or we can have it all on at the same time.
While all the valves on the splash pad are not necessary, it really is a nice added feature because sometimes G doesn’t want the water coming down from the top and sometimes he does. It’s nice to have options.

*A note on the connecting pieces:
This is another one feature that isn’t necessary but is nice to have. Our thought in having so many connecting points was that you can take it apart and store it in the winter or move it easier without having to deal with having this huge contraption. It was nice to be able to take it apart and throw it in the car to take to a friends house for a party. If it was all glued together in one piece we wouldn’t have been able to do that. So where we have the Male – Female connections is where it comes apart.
*A note on the dimensions:
We made it this size because we wanted to be able to put it around the 5ft by 5ft kiddie pool we have. You can make it any size you want. This has proven to be a good size for us though even when the pool isn’t inside of it. Plenty of room for kids to run underneath the water and play inside or outside of it.

What you need:
TOOLS:
Pipe Cutter or hand saw
PVC Pipe Glue
Tape measure
Sharpie or pencil – something to mark your lines so you know where to cut
Drill
MATERIAL:
4) 10ft 3/4″ PVC pipes
PVC pipe cement
6) valves (again, you don’t have to have this many, if you just put one on the end to control the water coming in from the hose, and one to control the top waterfall part I think that is plenty.)
5) 3/4″ 90-degree elbow pieces
How to build this thing:

 I think the easiest way to build this would be to look at the picture diagram and just copy that when connecting it all together. But I will try my best to give you some sort of steps to follow.
- Cut pipes to the following dimensions & sizes:
- 2 pvc @ 78 in
- 1 pvc @ 69 in
- 2 pvc @ 39 in
- 2 pvc @ 33 in
- 1 pvc @ 6 in
- 12 pvc @ 3 in

- You want to start with the side between Corner A & B, but between the Tee @ Corner A & the Elbow @ Corner B…we are going to cut this down so DON’T connect the ends just yet!
Assemble as follows: [ 69 in pvc + Male + Female + 3 in pvc + Valve + 6 in pvc ]

- Take that entire connection without the ends & cut it down to 78 in (take it out of the long 69 in piece). This is really the only complicated part. Everything else should be pretty exact measurements & you won’t have to cut anything down after assembly.

- Connect the appropriate pieces starting with the diagram of Corner A. You don’t need to do the right side of the Tee in the above diagram of Corner A till the very end.
- Here is a general overall picture of where all the long pvc pieces go
- Follow the pictures & you should be ok. Pretty self-explanatory.


- The top piece goes together like this: [ Female + 25 in pvc + Elbow + 78 in pvc + Elbow + 25 in pvc + Female ]
- After assembling & gluing you should have 5 larger pieces that all go together (this is including the small piece in the Corner A picture to the right of the Tee). We suggest labeling them so you know which end goes where.
- It’s probably much easier to just look at the picture & do your own version. Sorry if this is confusing.


For Holes:
We wanted to make sure we didn’t have too much or too little pressure, so we drilled a few holes, tested, then drilled a few more. We connected everything together, had the water on, but the inlet valve off so we didn’t have to keep walking over to turn the water off every time we wanted to add more holes. Holes were mostly drilled at angles pointing to the center because we wanted it to surround the kiddie pool.

2 comments
Comments are closed.